

Install and Connect
Add the extension to Chrome and connect it to your project. It takes a couple of minutes, and you do it only once.
Install from the Chrome Web Store
Section titled “Install from the Chrome Web Store”- Open Testomat.io on the Chrome Web Store.
- Click Add to Chrome, then click Add extension in the dialog.
- Click the puzzle icon in Chrome’s toolbar, then click the pushpin next to Testomat.io. The extension icon now stays in the toolbar.
- Click the Testomat.io icon. The side panel opens on the Connect to Testomat.io screen.
Connect to Your Project
Section titled “Connect to Your Project”You authorize once. After that, the extension finds each project’s API key on its own, so you don’t need to copy any keys.
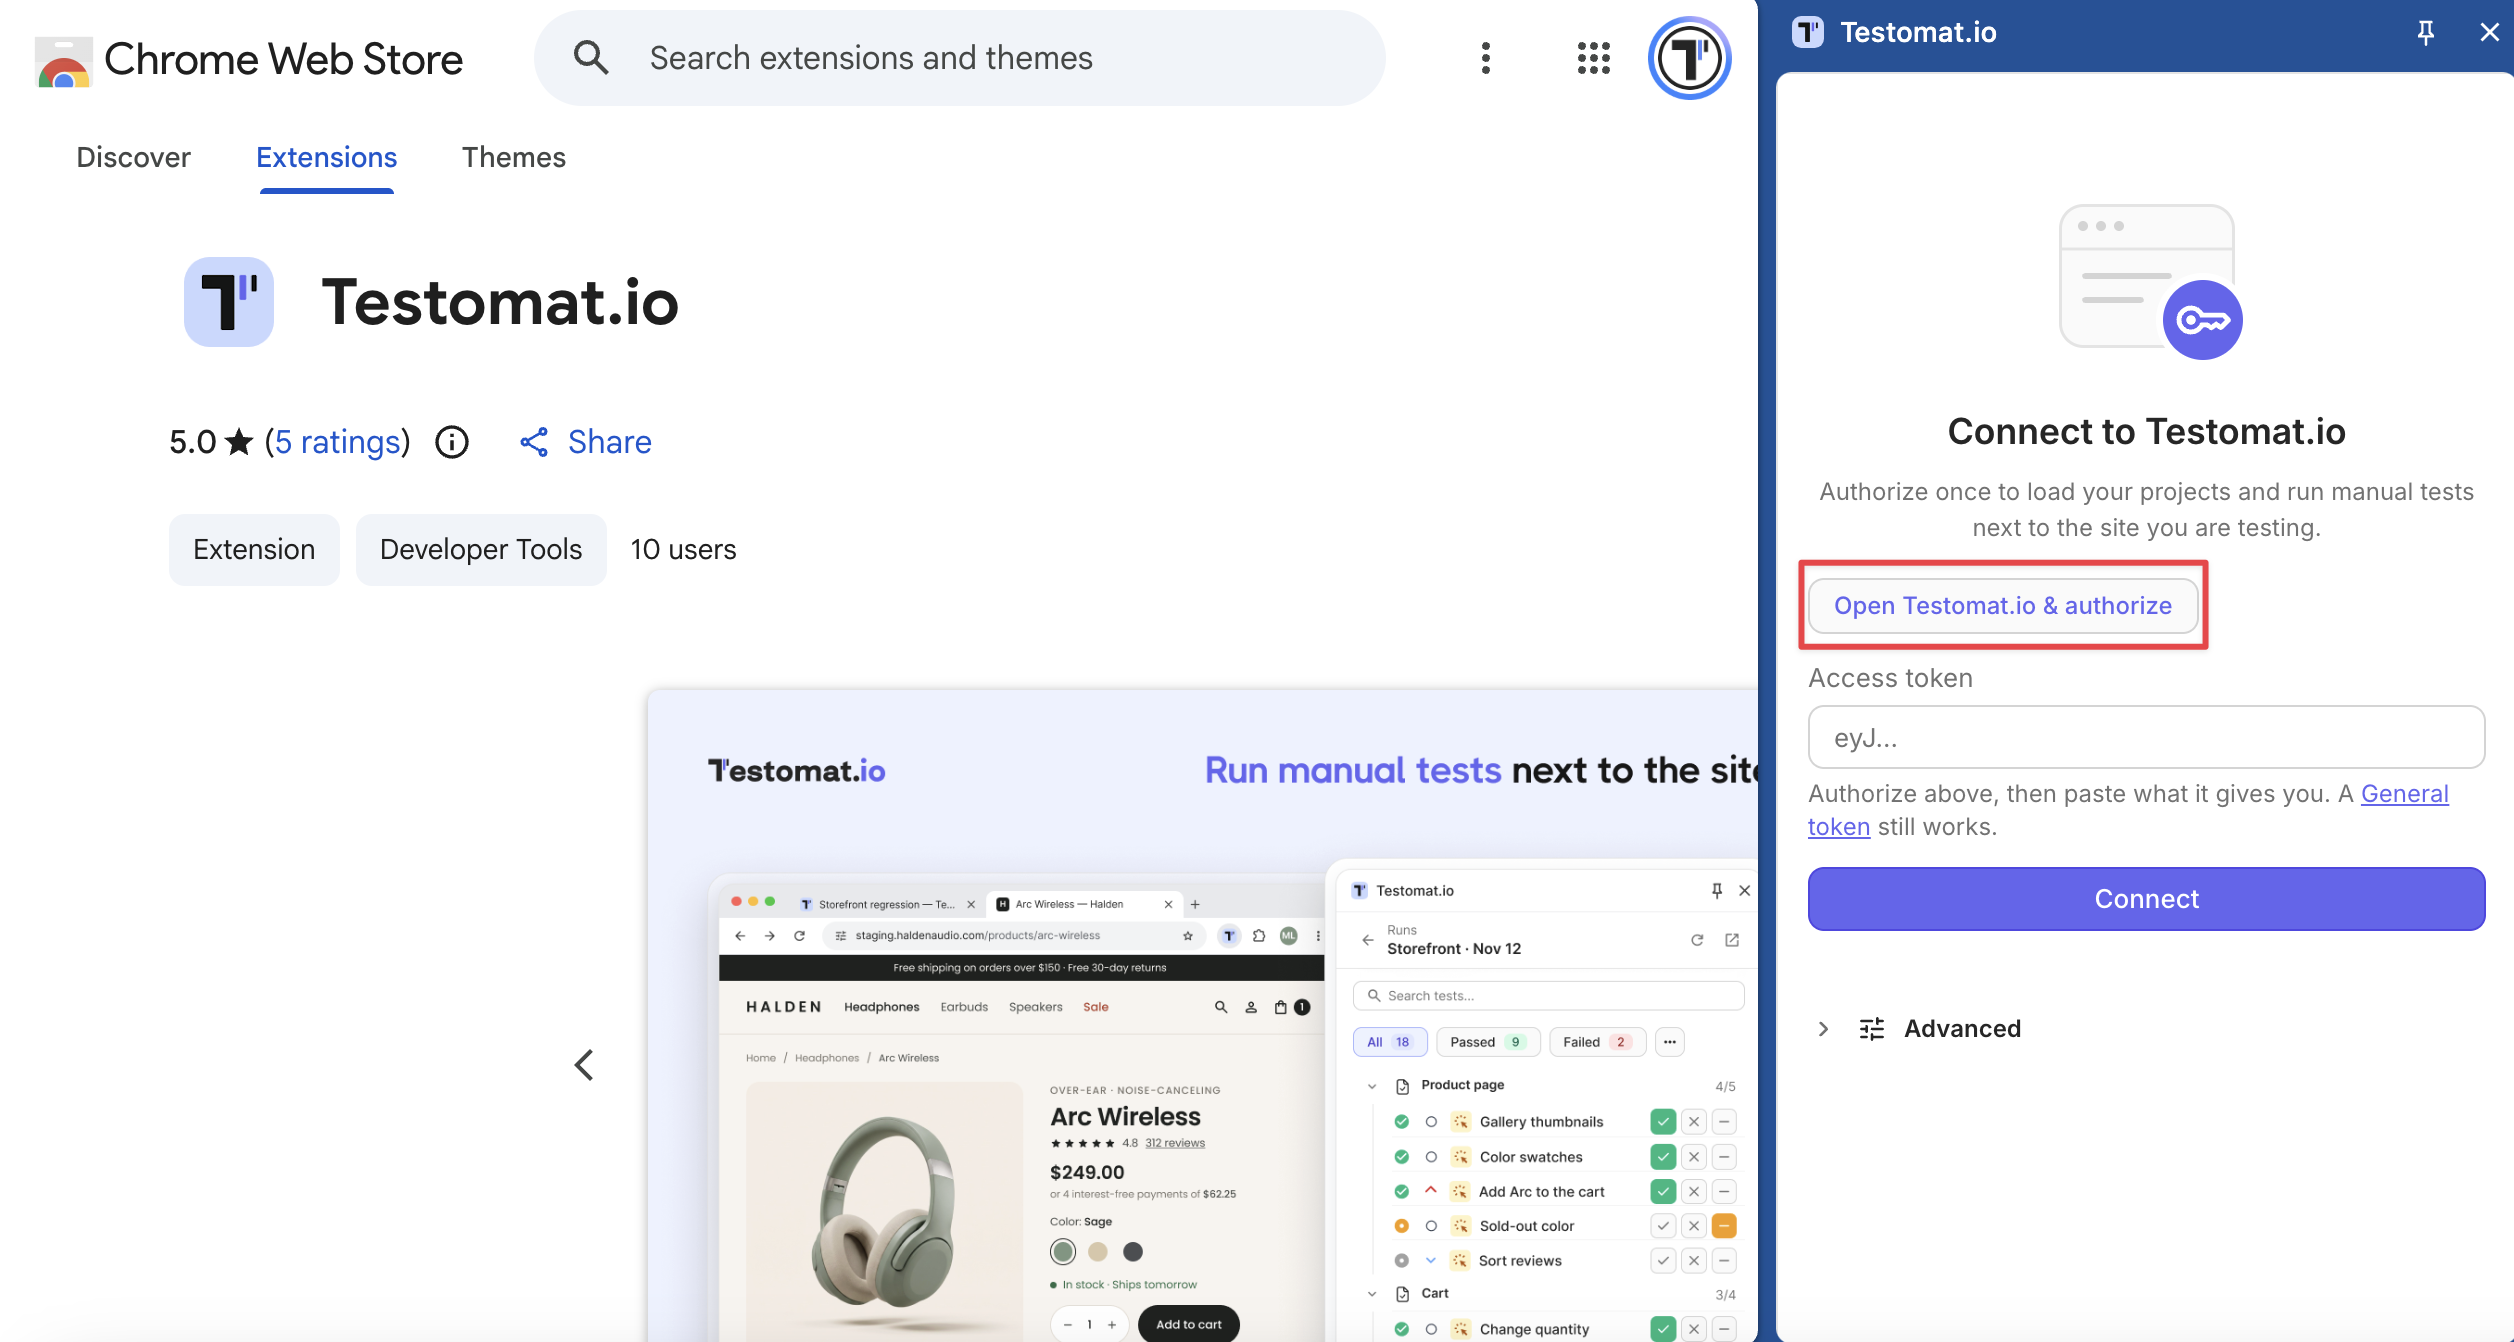
- Click Open Testomat.io & authorize. Testomat.io opens in a new tab and shows an access token. Sign in first if it asks you to.
- Copy the token, paste it into Access token, and click Connect.
- On the Choose a project screen, find your project and click it.
That’s it — the panel is connected. You can switch to another project any time from the panel header.
Connect a Self-Hosted Instance
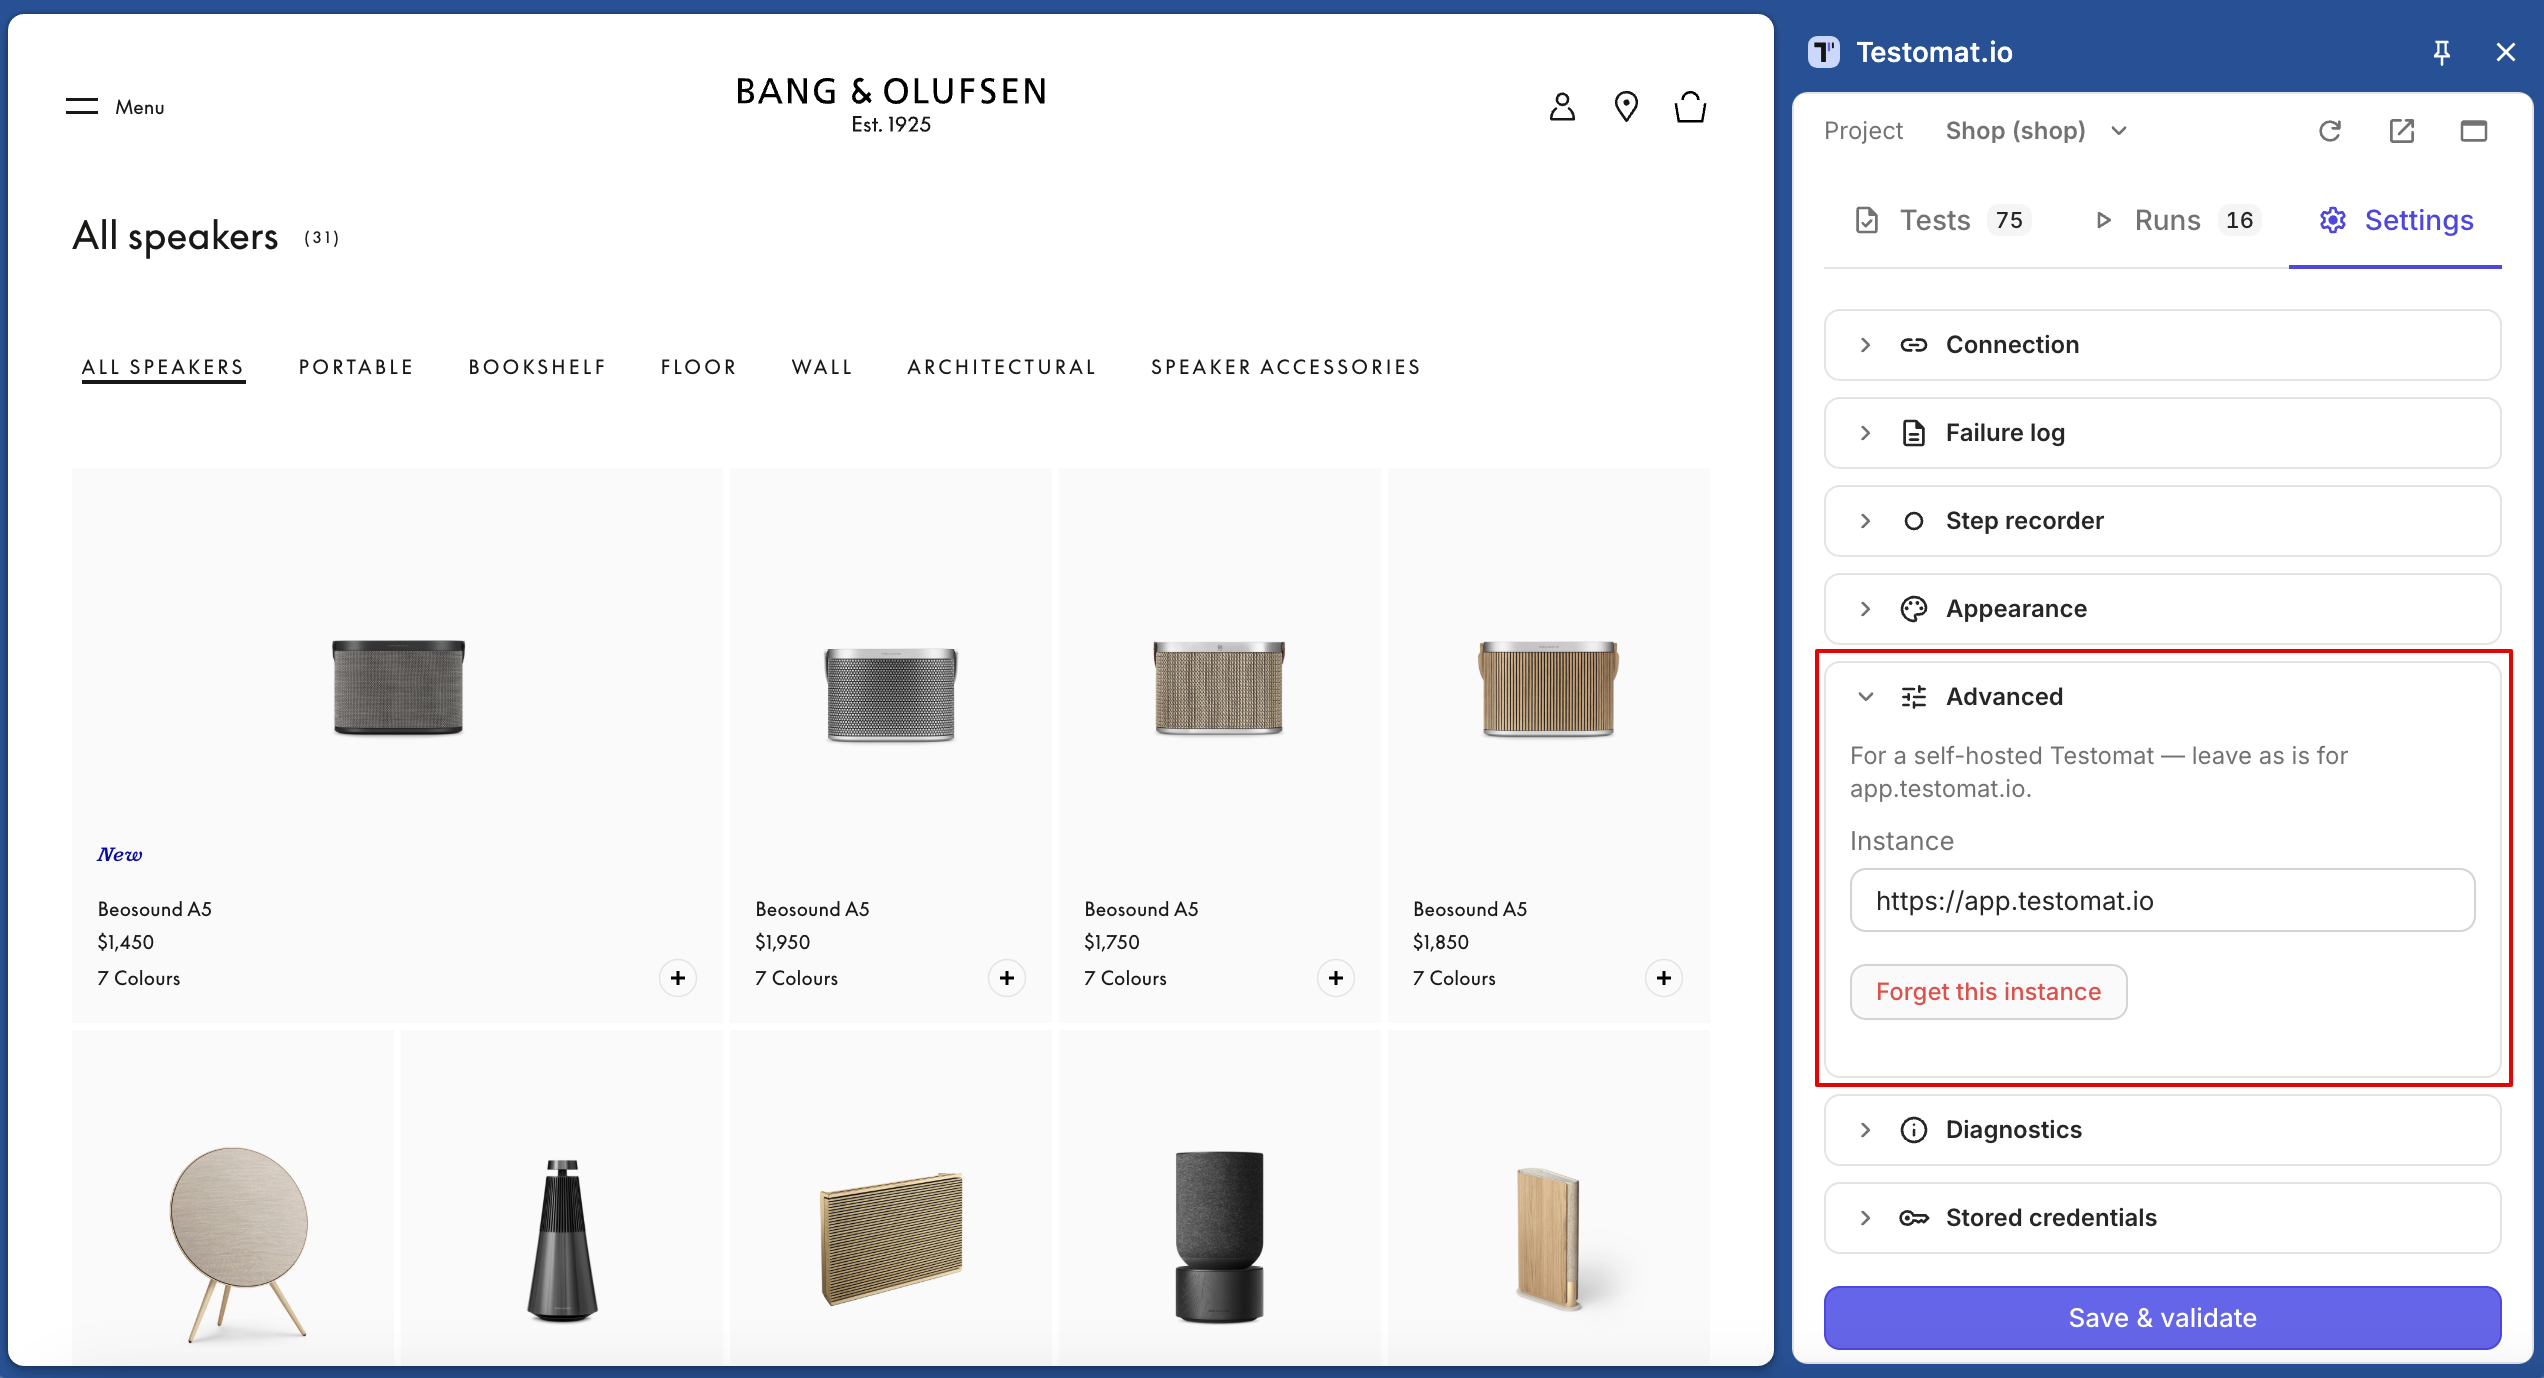
Section titled “Connect a Self-Hosted Instance”If your company runs its own Testomat.io server, set its address before you authorize:
- On the connect screen, open Advanced.
- Enter your server’s
https://URL in Instance. The panel connects only over HTTPS. - Continue from step 1 of Connect to Your Project. The authorize button now opens your server.
Check or End the Connection
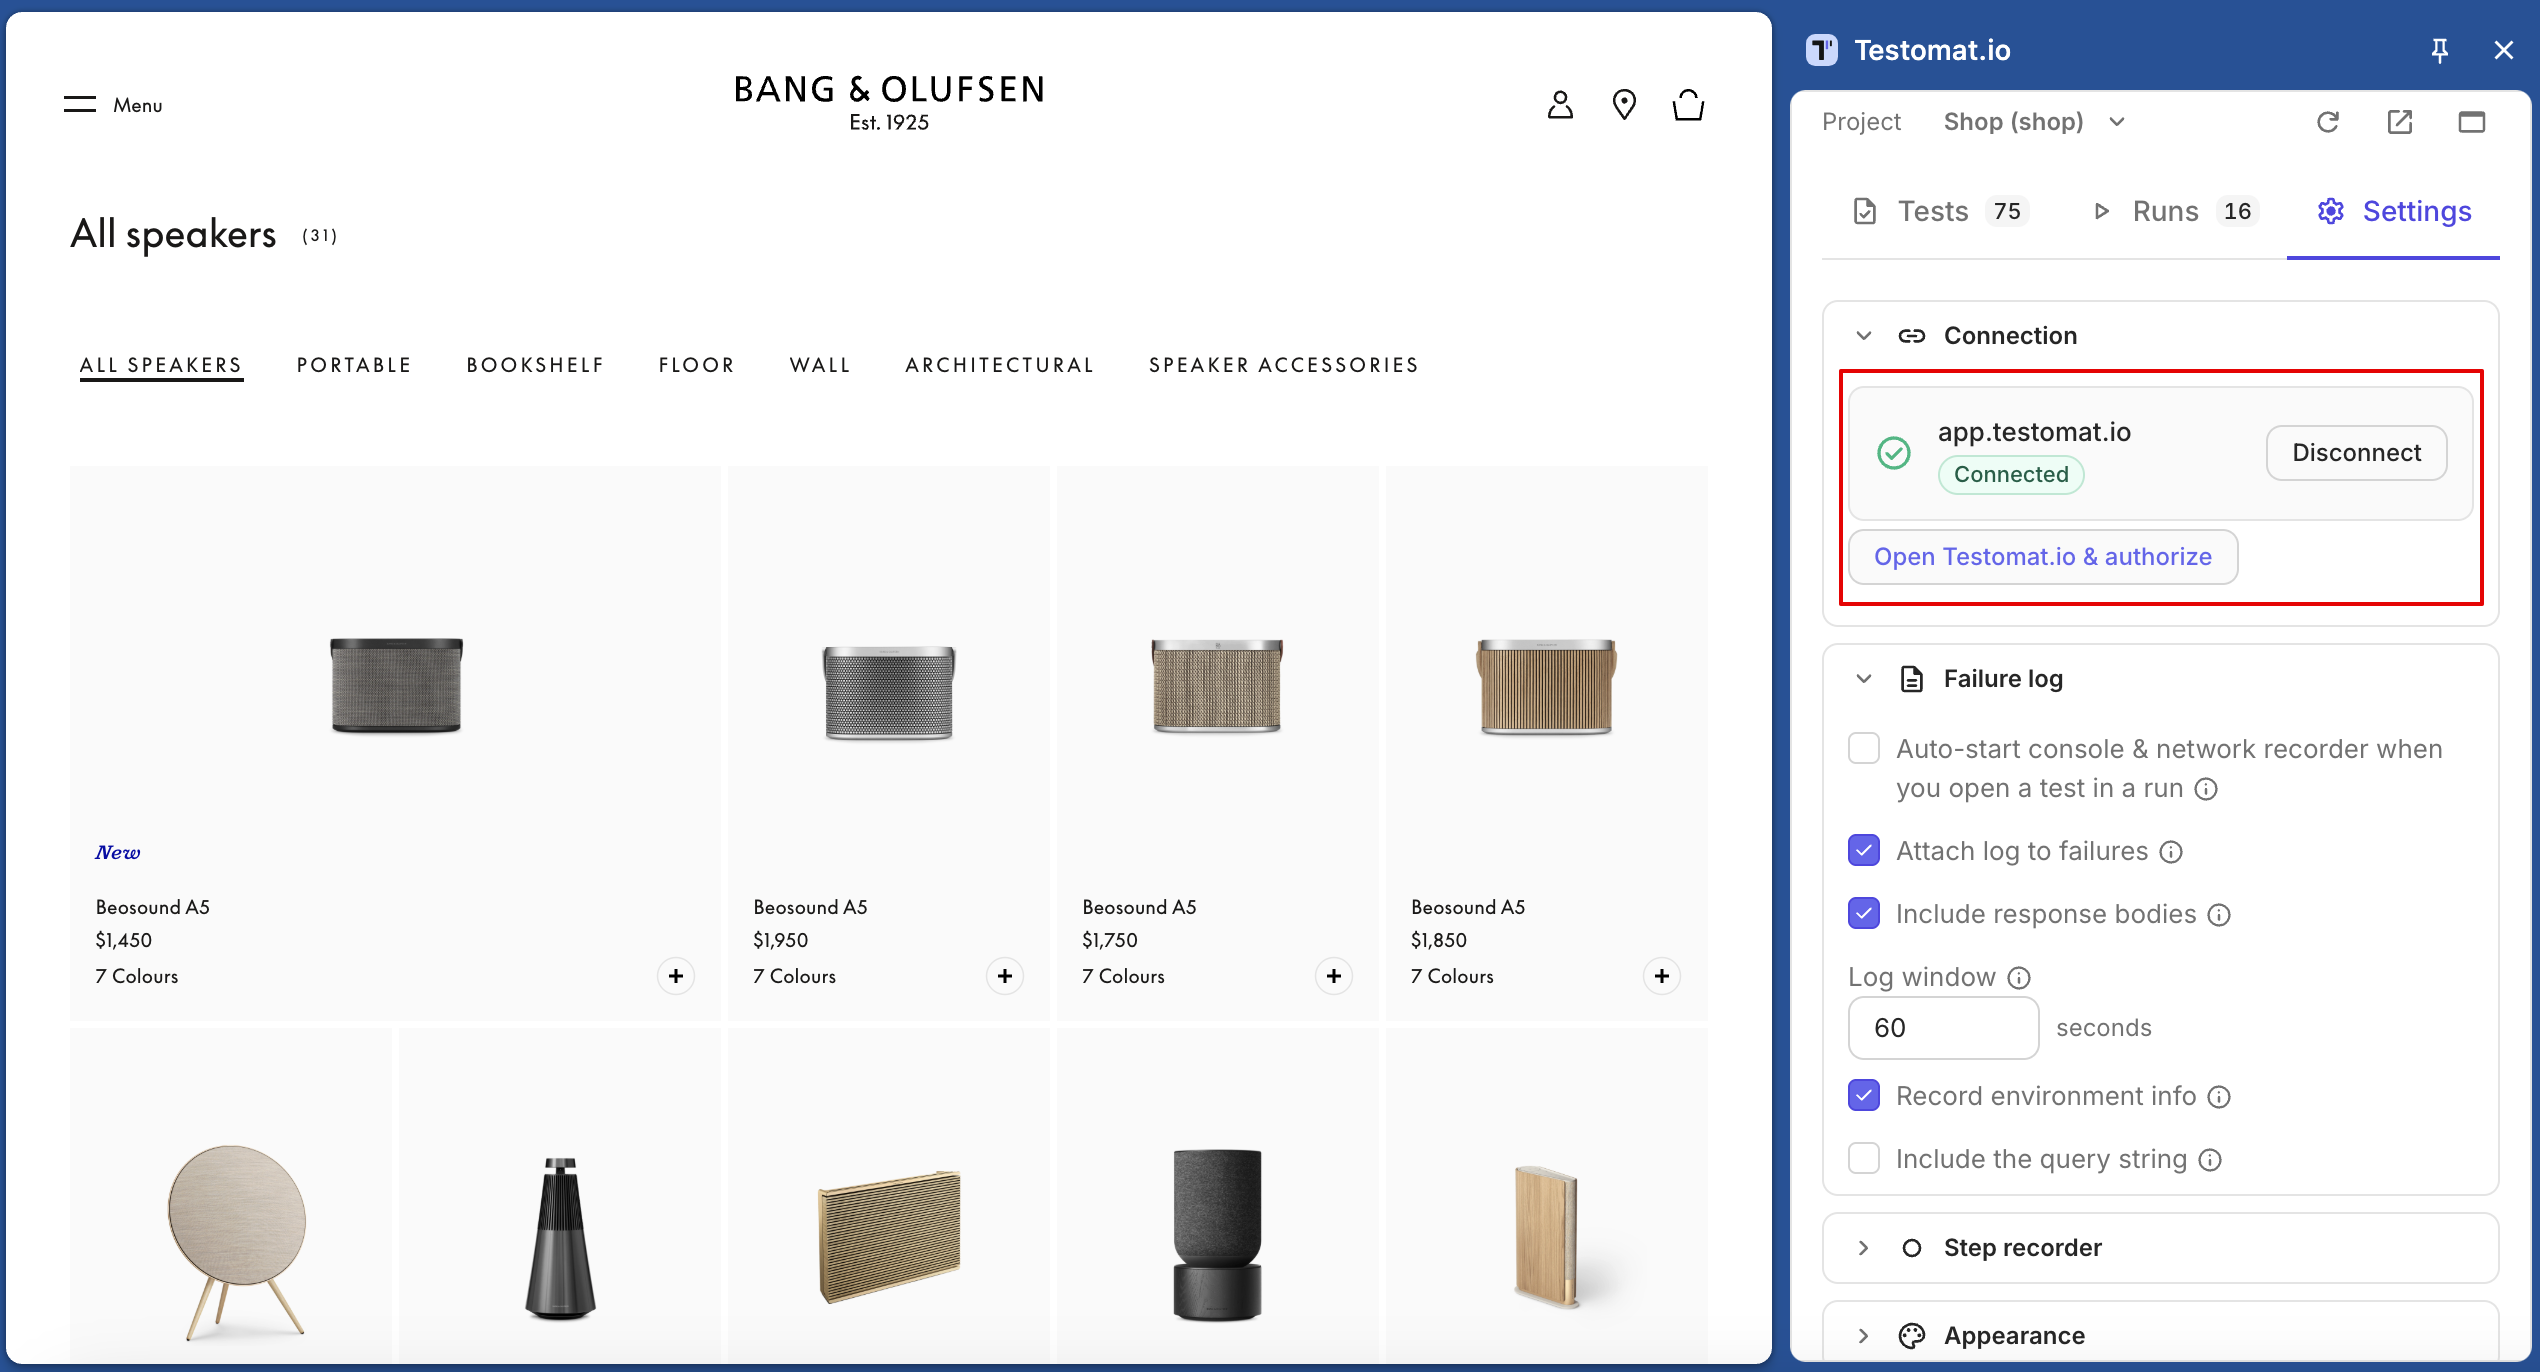
Section titled “Check or End the Connection”- Open Settings.
- Go to Connection. The card shows the server you’re connected to, the Connected badge, and the current project.
- To disconnect, click Disconnect — the panel returns to the connect screen.
Basic Mode
Section titled “Basic Mode”If the panel loses its session with Testomat.io, it switches to basic mode instead of stopping. A banner tells you when this happens.
In basic mode you can still open runs, set statuses, and add comments. These features turn off until the session is back:
- finishing a run;
- priority, custom statuses, and assignee;
- syncing ticked steps — they stay only in your panel.
To get the full panel back, sign in to Testomat.io in the same browser and click Refresh on the banner.
Install from GitHub
Section titled “Install from GitHub”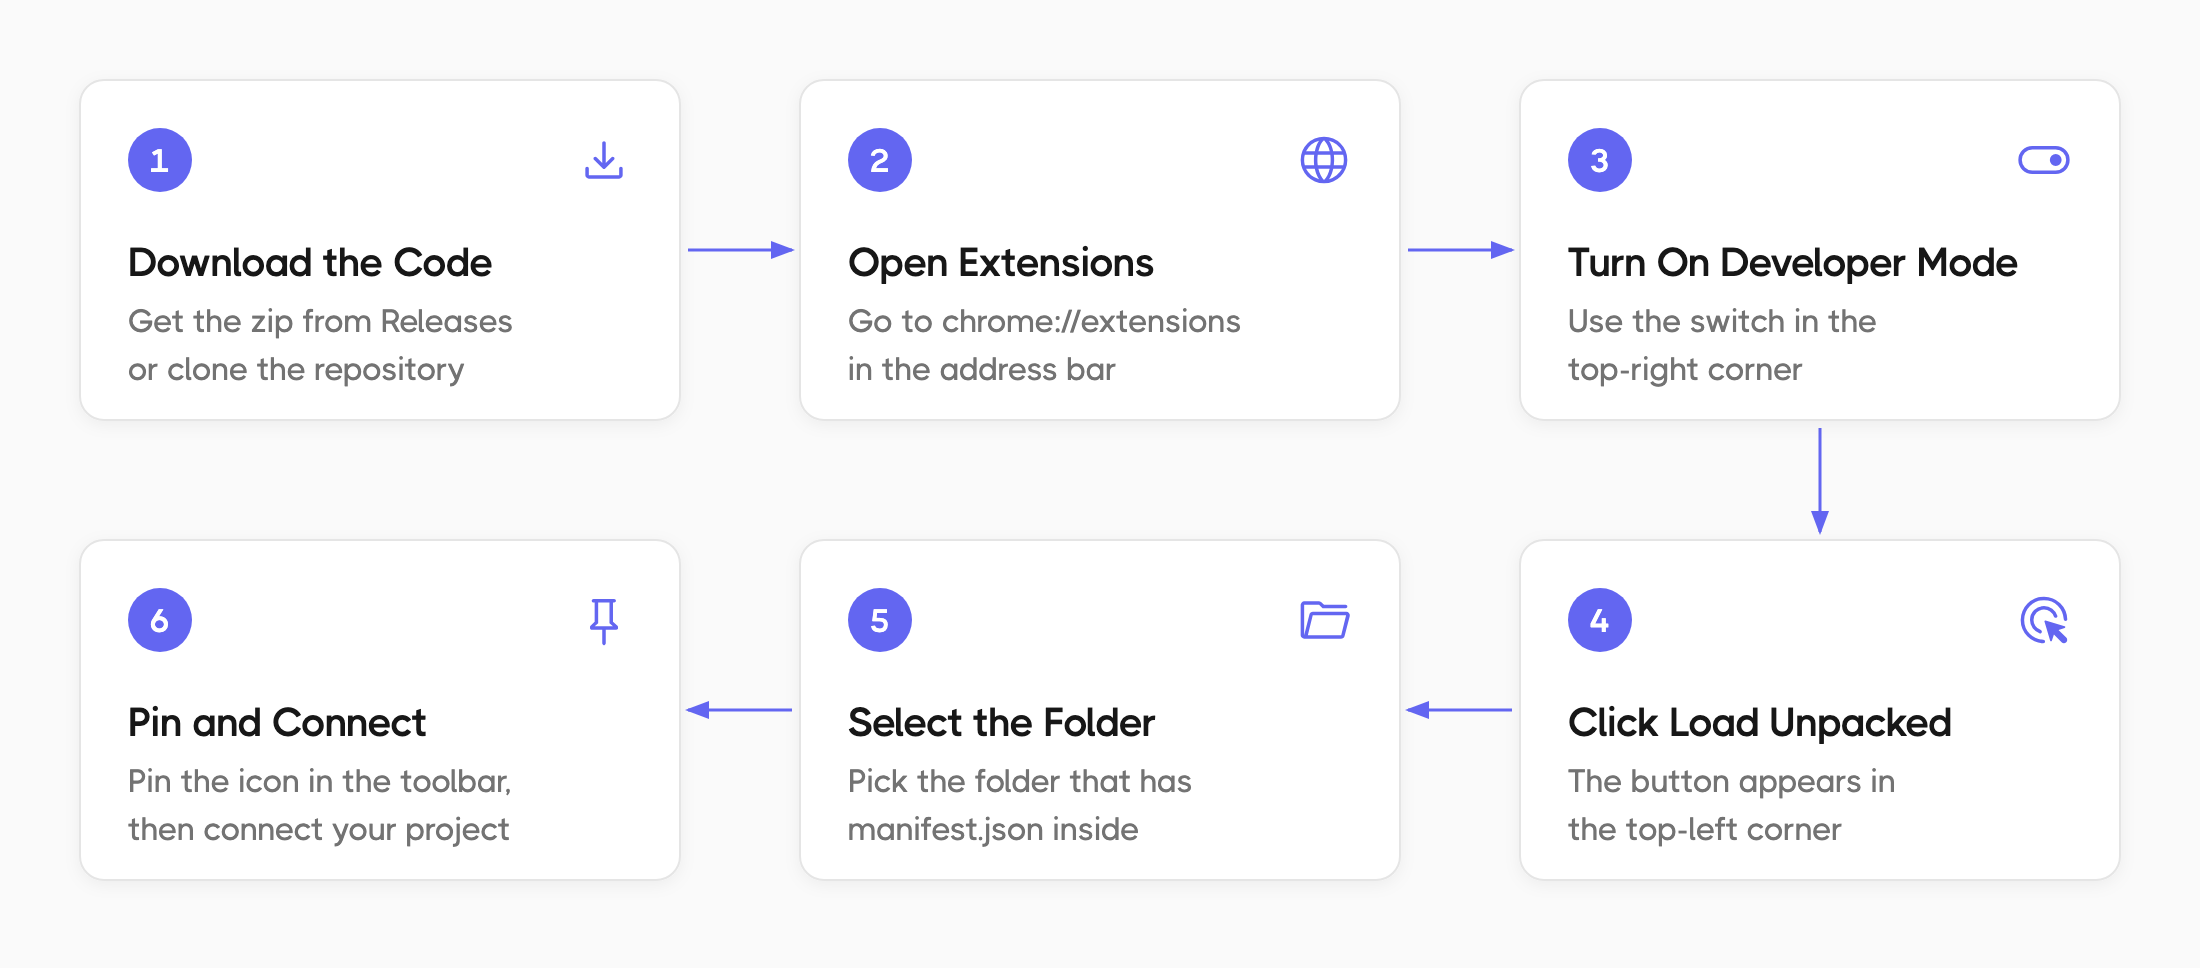
The extension is available on GitHub. Run the source code instead of the store version. The GitHub copy and the store copy share the same ID, so Chrome keeps only one of them.
- Get the extension folder in one of two ways:
- download the newest
testomat-io-<version>.zipfrom Releases — the file under Assets without-webstorein its name — and unpack it; - or clone the repository:
git clone https://github.com/testomatio/browser-extension.git.
- download the newest
- Open
chrome://extensions. - Turn on Developer mode in the top-right corner.
- Click Load unpacked and select the folder that has
manifest.jsondirectly inside: the unpacked folder from the zip, or theextension/folder in the cloned repository. - Pin the icon and connect, as described in Install from the Chrome Web Store and Connect to Your Project.
A copy loaded from GitHub doesn’t update on its own. To update it, replace the folder contents with a newer version (or run git pull), then click the reload icon on the Testomat.io card in chrome://extensions. Your token, settings, and unsent results stay after the reload.